HostFraser.com hosting supports Python. To gain an understanding of how Python-based applications work on your hosting servers, this article illustrates: How to install the Django framework-powered Mezzanine CMS on the hosting platform via SSH:
Step 1: Create a virtual environmеnt (venv) in the root folder of your account, in our case:
/usr/local/python-3.5/bin/virtualenv /home/venv/
Step 2: Enter the newly created virtual environment using the following command:
source /home/venv/bin/activate
Step 3: Go to the “www” folder of your hosting account:
cd /home/www/
Step 4: Install the Mezzanine CMS binaries along with the corresponding modules fastcgi support and flup6.
pip install git+https://github.com/NetAngels/django-fastcgi
pip install flup6
pip install mezzanine
NOTE: Make sure you disable the “Outgoing Connections” option or the installation of the modules will fail.
Step 5: Set up the Mezzanine project In a selected custom directory, in our case mydjangocms:
mezzanine-project mydjangocms
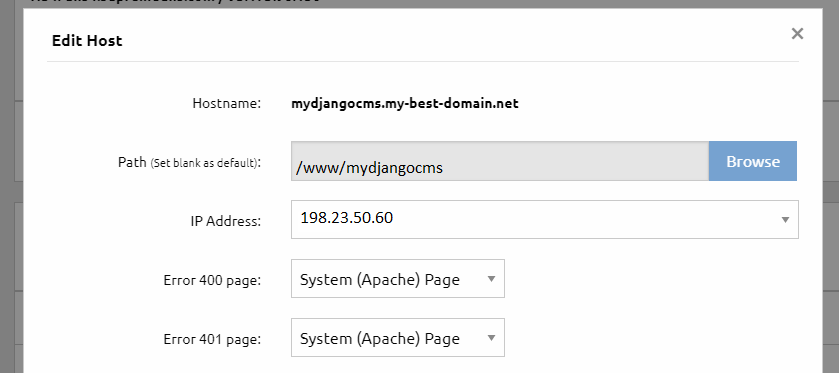
Step 6: Create a domain or subdomain for the newly installed CMS. Keep in mind that the Jail host option needs to be deactivated in order for the installed modules to function properly.
Point your newly created domain or subdomain to the path of your project. In our example, the path is “/www/mydjangocms”:
Step 7: Go to the newly created Mezzanine CMS folder:
cd mydjangocms
Step 8: Set up a database for your CMS. In our case, we’ll use the sqlite3 database for the sake of ease (alternatively, you could set up a MySQL/PostgreSQL database by applying the necessary settings to the Python setup file:
python manage.py createdb
You will see the following message:
A site record is required.
Please enter the domain and optional port in the format ‘domain:port’. For example ‘localhost:8000’ or ‘www.example.com’.
Hit enter to use the default (127.0.0.1:8000):
Use the default option for the SQL host. You will then be asked to enter your username, email and password. These are the login credentials for the CMS system and not the database.
In the end, you can choose if you want to have some demo content inserted.
Step 9: Set up an .htaccess file in the folder of your project with the following entries:
RewriteEngine On
RewriteCond %{REQUEST_FILENAME} !-f
RewriteCond %{REQUEST_FILENAME} !-d
RewriteRule ^(.*)$ /index.fcgi/$1 [QSA,L]
Step 10: Set up an index.fcgi file in the folder of your project using the following code (it will serve as an entry point for all requests to the CMS). Don’t forget to replace “mydjangocms” with the name of your project:
#!/home/venv/bin/python3.5
# -*- coding: utf-8 -*-
import os
import sys
activate_this = ‘/home/venv/bin/activate_this.py’
exec(open(activate_this).read(), dict(__file__=activate_this))
cms_path = ‘/home/www/mydjangocms/’
sys.path.insert(0, cms_path)
os.chdir(cms_path)
# Set the DJANGO_SETTINGS_MODULE environment variable.
os.environ[‘DJANGO_SETTINGS_MODULE’] = “mydjangocms.settings”
from django_fastcgi.servers.fastcgi import runfastcgi
from django.core.servers.basehttp import get_internal_wsgi_application
wsgi_application = get_internal_wsgi_application()
runfastcgi(wsgi_application, method=”prefork”, daemonize=”false”, minspare=1, maxspare=1, maxchildren=1)
Step 11: You’ll need to make the index.fcgi file executable using this command:
chmod +x index.fcgi
Step 12: Edit the settings file located inside “mydjangocms/settings.py” and replace
ALLOWED_HOSTS = []
With your actual host name:
ALLOWED_HOSTS = [‘mydjangocms.my-best-domain.net’]
Step 13: Run the following command to collate the static files:
python manage.py collectstatic
You are now ready and your site should be up and running.
Now you can log into your Mezzanine CMS Admin Panel using the login details set in step 8 above and kickstart a new blog, for example.